Bio Menace Speedrun Routing

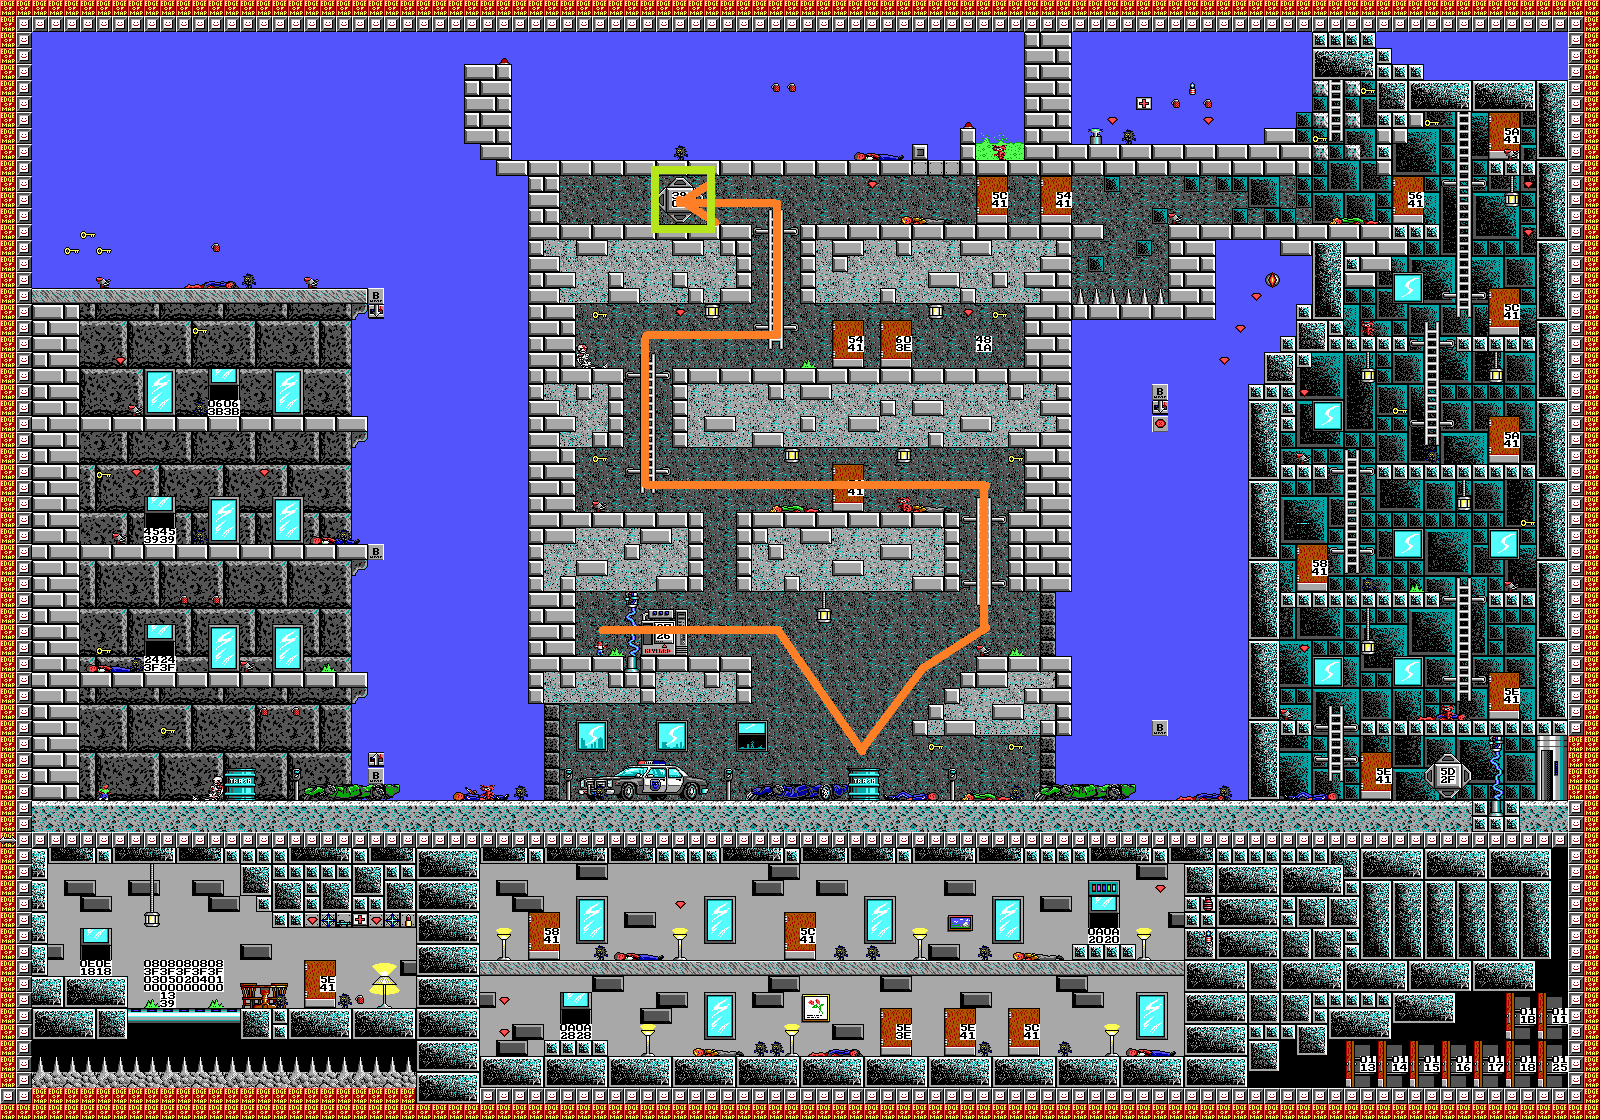
1-1: City Center


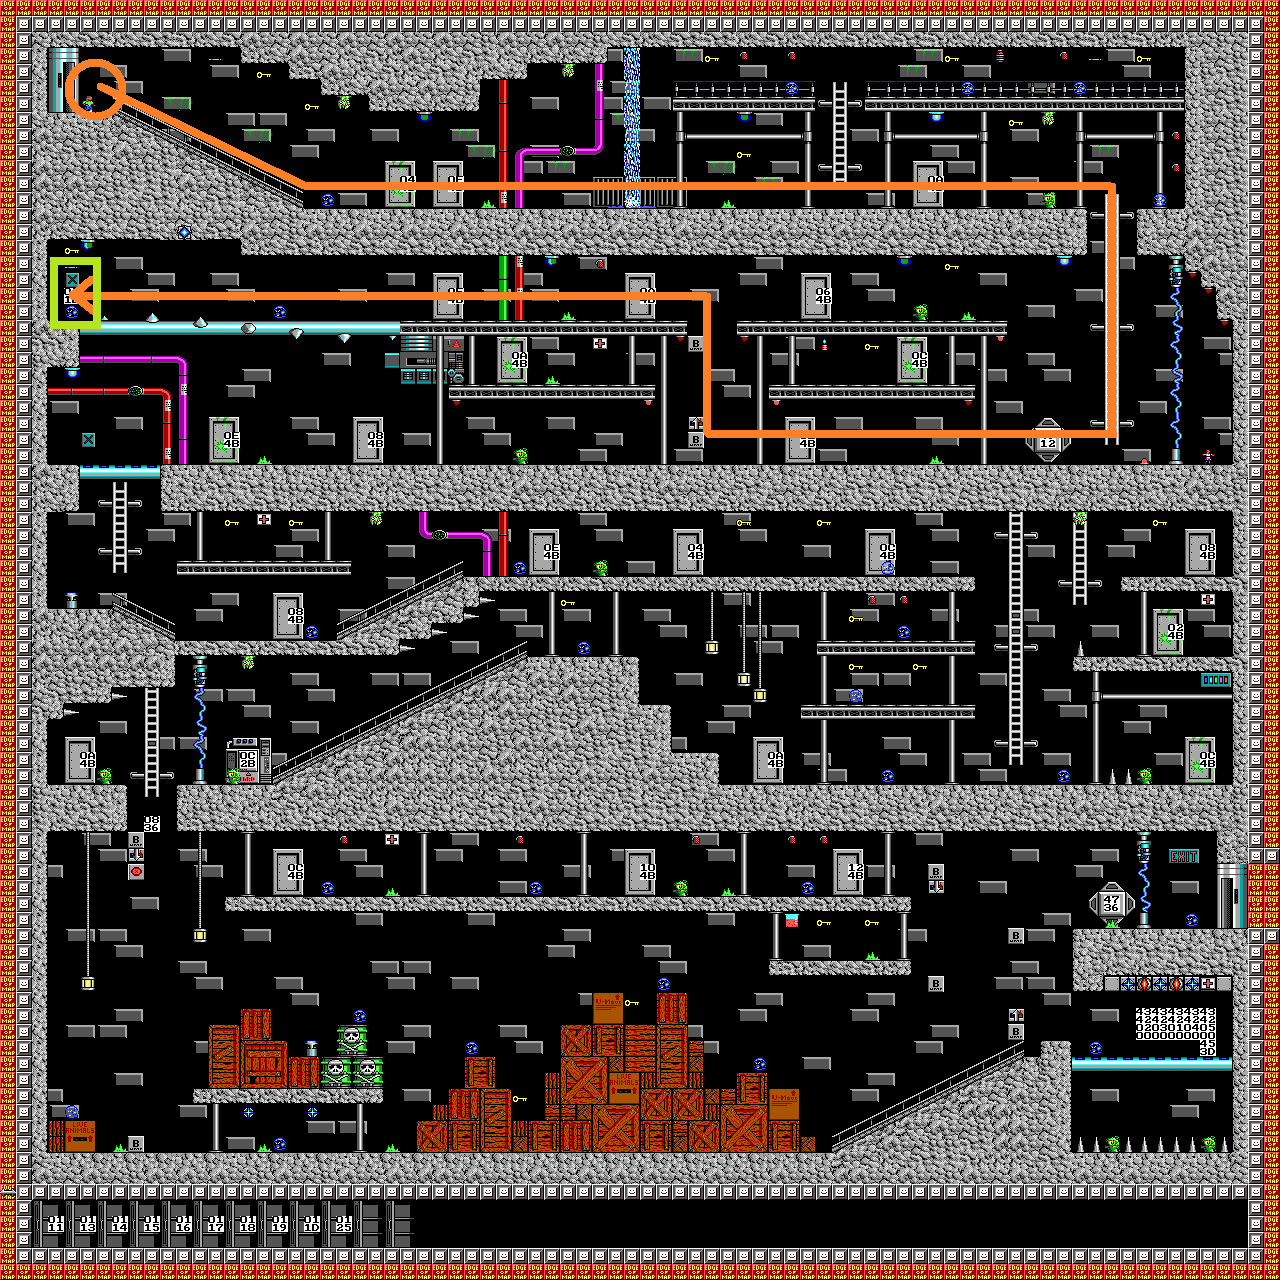
1-2: High Rise


1-3: City Park


1-4: South Side


1-5: Sewer


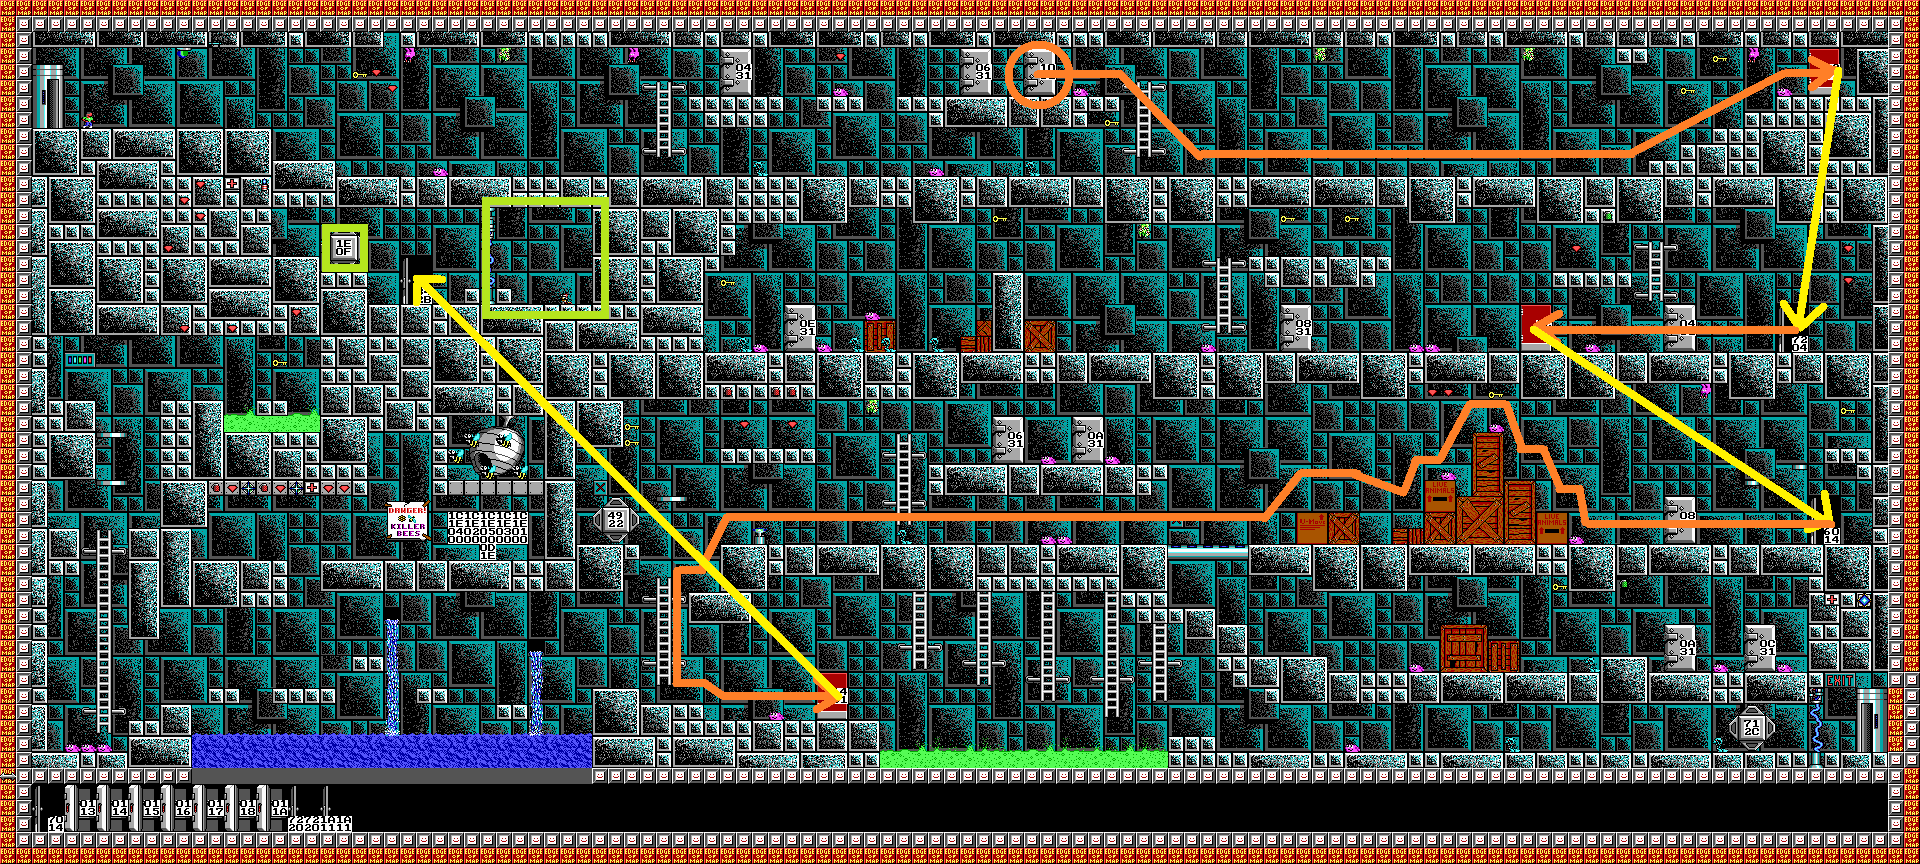
1-6: Cave


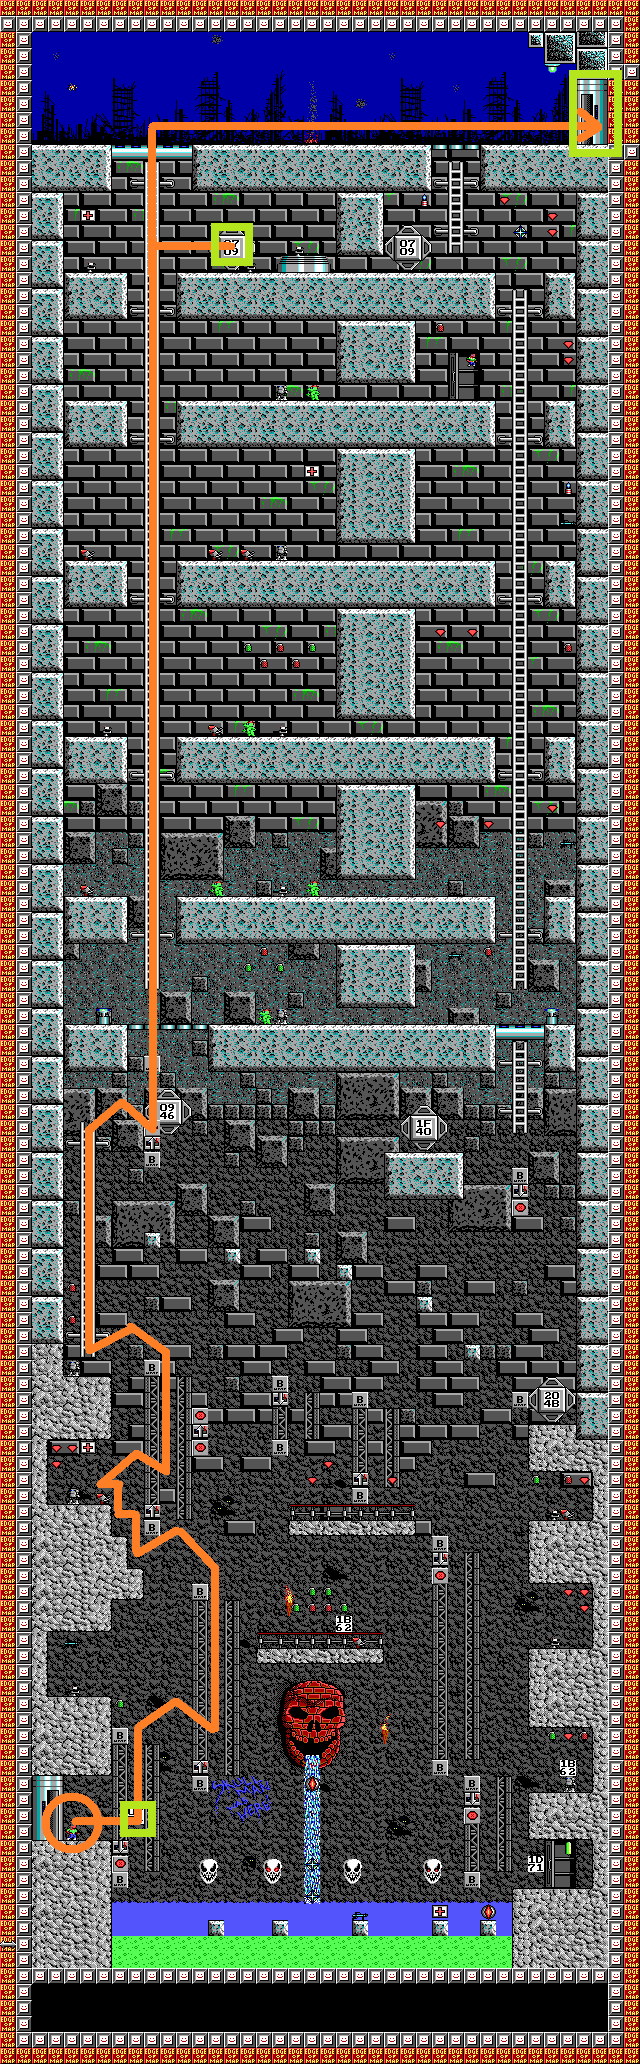
1-7: Skull Man

1-8: Elevator
1-9: No Man's Land

1-10: Lab Entrance


1-11: Computer Core


1-12: Mangle's Last Stand

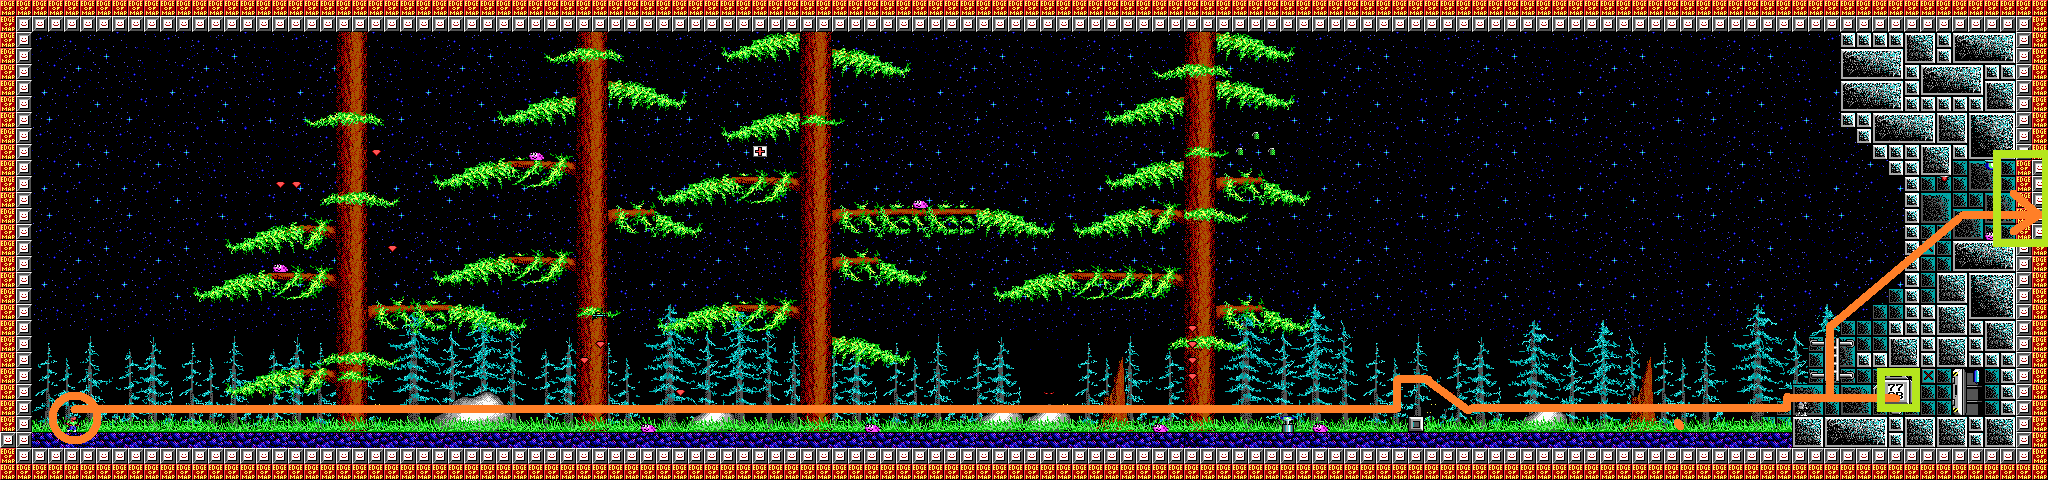
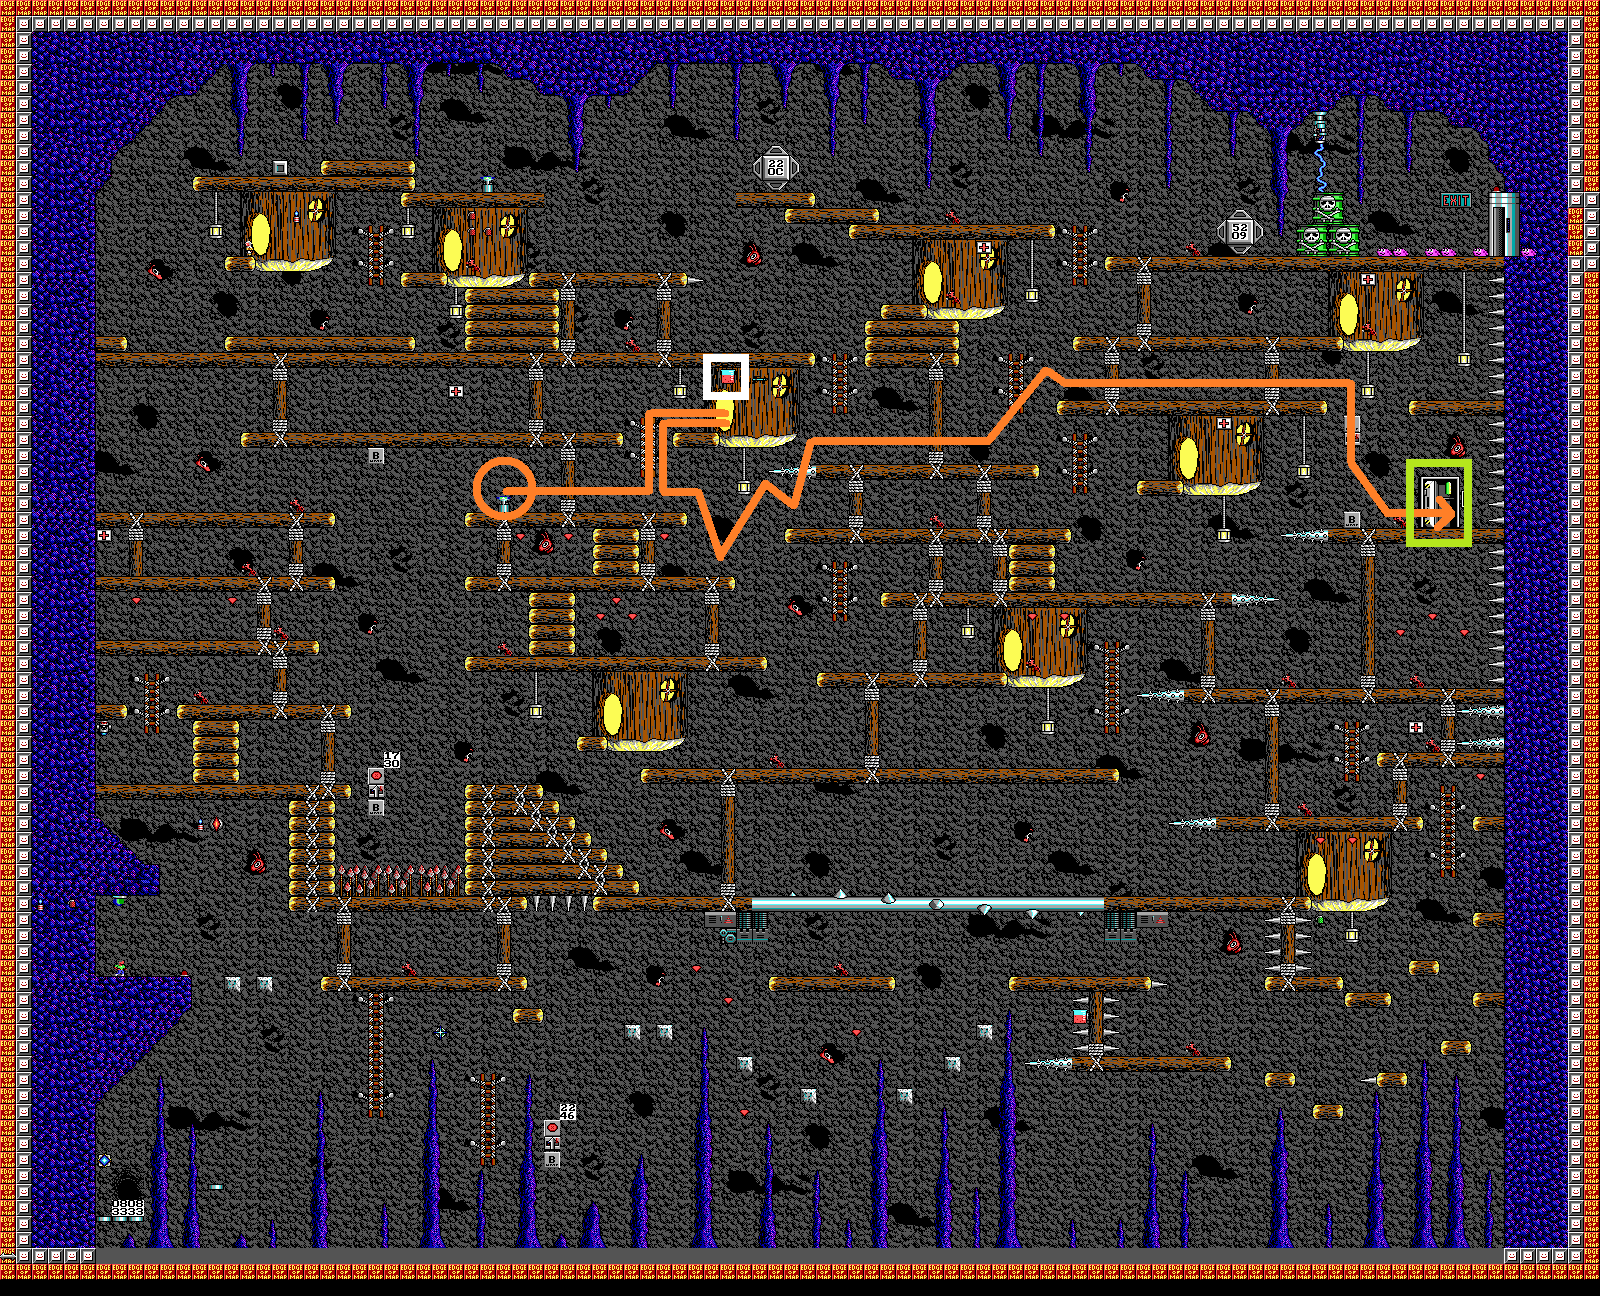
2-01: Outer Woods
2-02: Main Corridor


2-03: Ant Caves


2-04: Ant Town


2-05: The Queen


2-06: Trash Dump


2-07: Trash Boss

2-08: Electronics Lab


2-09: Genetics Lab


2-10: Specimens Lab

2-11: Killer Pillers


2-12: The Enforcer


3-01: Barricade


3-02: Fort Entrance


3-03: Guard Tower


3-04: Cyborg Trouble


3-05: Goliath!


3-06: Armory


3-07: Mutants Attack


3-08: Robots Attack


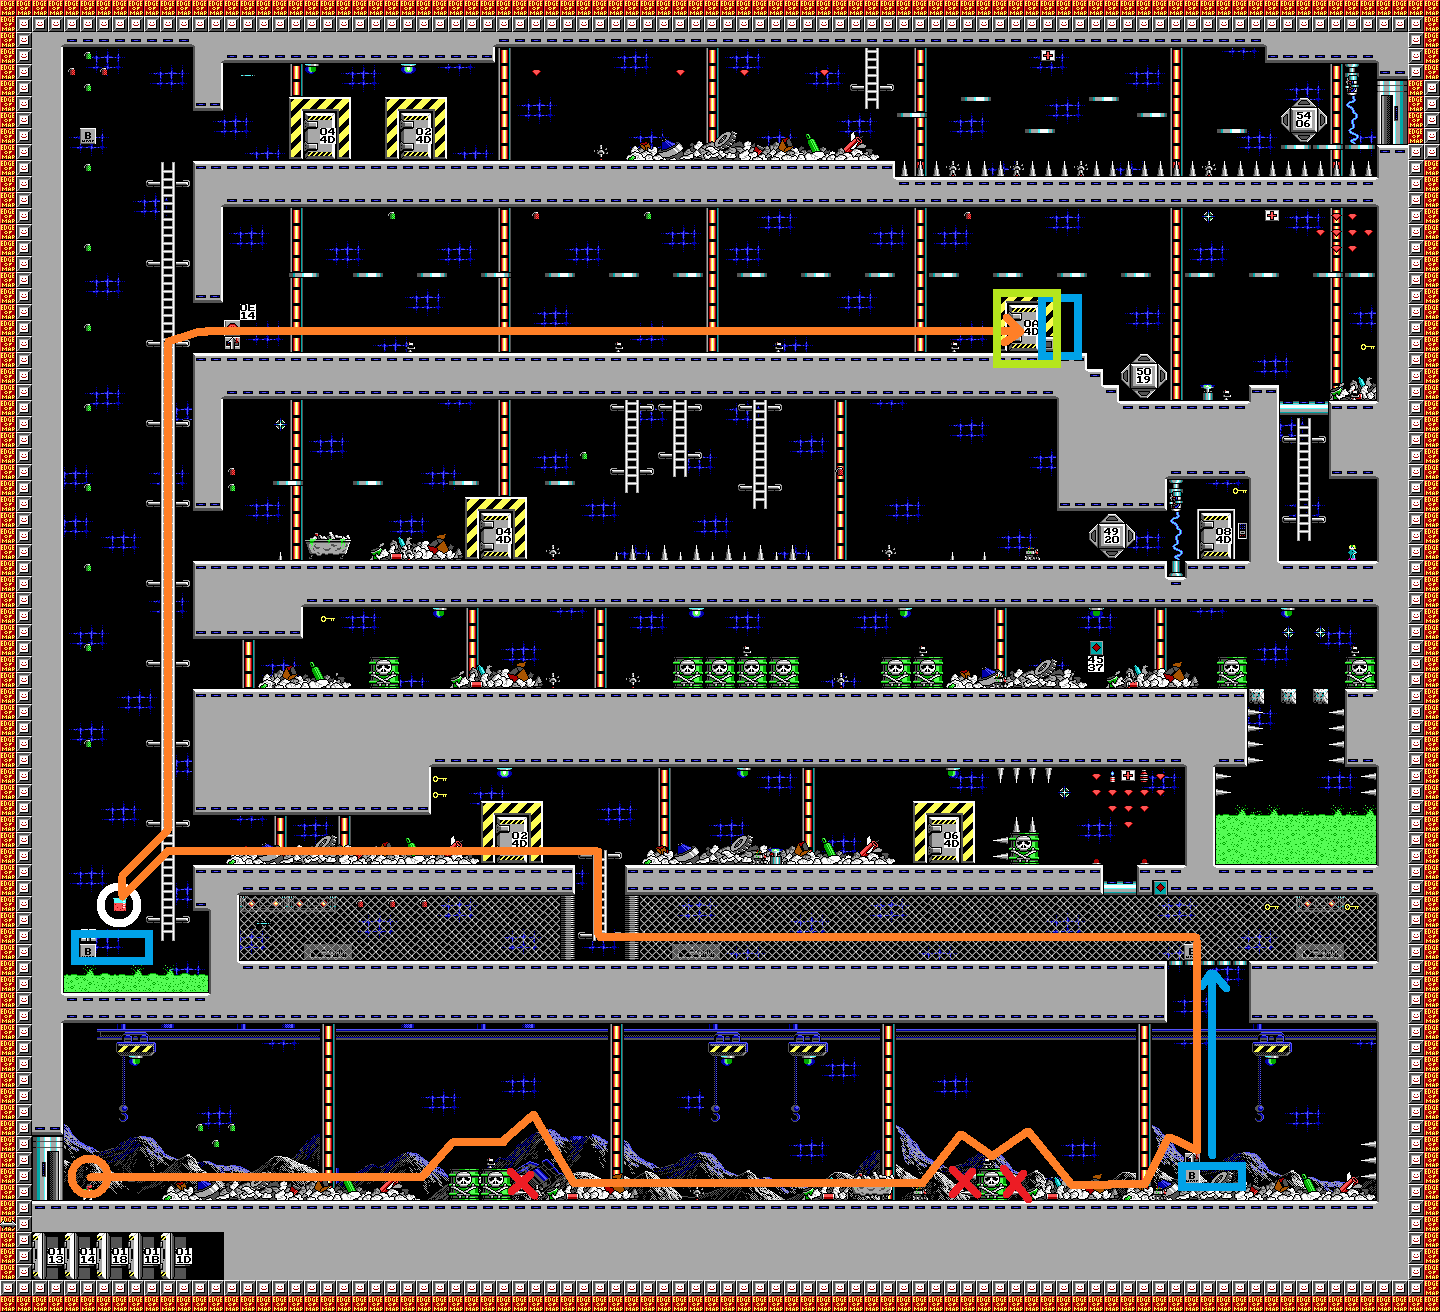
3-09: Utility Maintenance


3-10: Main Control


3-11: Circle of Death


3-12: Master Cain
